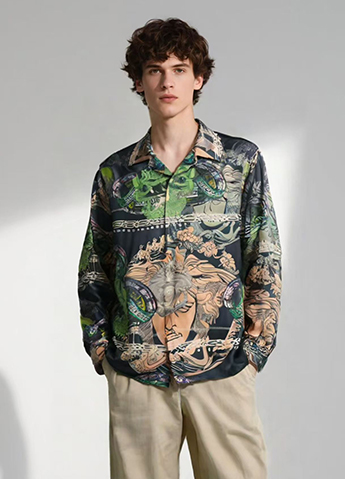
Preventing pattern misalignment on a printed camp collar shirt requires control at every stage, from artwork preparation and fabric printing to cutting, sewing, and final inspection. Buyers, fashion brands, and production teams usually want a practical method that reduces mismatched stripes, broken motifs, uneven pocket placement, and rejected garments.
This guide explains the tools, production settings, inspection points, and step-by-step procedures needed to keep printed camp collar shirts visually consistent. Meninthemirror supports apparel teams that need accurate print placement and dependable shirt construction. Reference image: 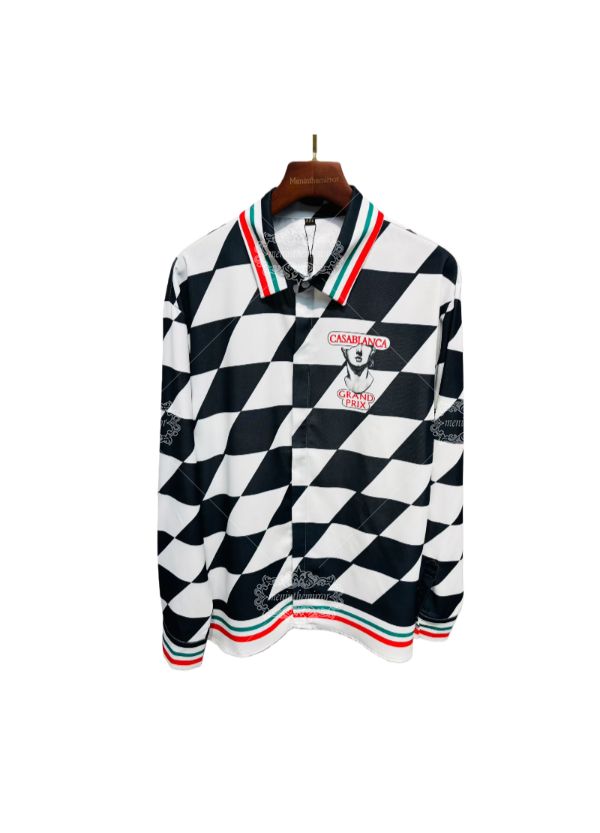
Identify the Main Causes of Pattern Misalignment
Pattern alignment problems rarely come from one mistake. They usually result from artwork distortion, fabric movement, inaccurate cutting, or sewing tolerances that accumulate across several operations.
Artwork is not prepared for garment placement
A repeating print may look correct on a flat design file but become misaligned when it is divided among the front body, back body, collar, cuffs, and pocket. The artwork must be reviewed as a garment layout rather than as a single continuous image.
- Mark the center front, center back, shoulder line, pocket area, and collar area.
- Identify the design repeat size in both the lengthwise and crosswise directions.
- Check whether stripes, checks, borders, or large motifs require matching.
- Define the acceptable tolerance before production begins.
Fabric can stretch or shift during printing
Lightweight cotton, rayon, viscose, linen blends, and other soft shirting fabrics can move during printing or heat setting. Even a small amount of distortion can cause a visible mismatch at the center front or pocket.
- Use fabric with stable width and controlled shrinkage.
- Precondition or relax the fabric before printing and cutting.
- Record the usable fabric width after finishing, not only the nominal width.
- Check for skew, bowing, shrinkage, and uneven tension.
Cutting and sewing tolerances accumulate
If the front panel is cut slightly off grain and the pocket is sewn slightly out of position, the combined error becomes highly visible. Pattern alignment must therefore be checked before and during sewing, not only at final inspection.
Prepare the Artwork and Garment Pattern Correctly
Good alignment begins with a production-ready artwork file and a garment pattern that clearly identifies matching points.
Create a garment-specific print map
Place the actual shirt pattern pieces over the artwork to confirm where every key motif will appear. This step shows whether the print will land correctly at the center front, side seams, pocket, collar, and sleeve openings.
- Open the final artwork at its true production scale.
- Place the front, back, sleeve, collar, and pocket pattern pieces over the design.
- Mark the exact center line and grain line on each pattern piece.
- Identify important matching points, such as stripe intersections or repeated flowers.
- Indicate which pieces require a face-up, face-down, or one-way cutting direction.
- Add notches at the center front, center back, shoulder, pocket, and side seam.
- Export a placement guide that the printer, cutter, and sewing team can all use.
Set the correct repeat and registration marks
Registration marks help the printing team maintain a consistent relationship between the artwork and fabric. The marks should be placed outside the finished garment area whenever possible so they do not become visible on the shirt.
- Use clear registration marks at regular intervals.
- Include a scale marker to confirm that the artwork has not been resized.
- Include color references for each ink or print layer.
- Show the intended print direction and fabric face.
- Record the repeat measurement and allowable registration tolerance.
Check pattern pieces for directional requirements
Large motifs, directional graphics, stripes, and plaids often require all pieces to be cut in the same direction. A two-way cutting layout may save fabric but can turn a motif upside down or prevent side-to-side matching.
Use one-way markers on the pattern for:
- Front and back body panels with directional artwork.
- Camp collars with a visible border or stripe.
- Pockets that must match the body print.
- Sleeves with vertical or diagonal motifs.
- Patterned yokes, cuffs, and contrast panels.
Use the Required Tools for Accurate Alignment
The right tools make pattern alignment measurable instead of subjective. A production team should prepare these tools before sampling and bulk cutting.
Artwork and planning tools
- Vector or textile design software.
- Large-format printer or full-scale paper plotter.
- Digital measuring software or a calibrated ruler.
- Color reference cards and print strike-off sheets.
- Garment pattern files with grain lines and notches.
Fabric and cutting tools
- Fabric inspection table with backlighting if available.
- Calibrated fabric ruler and measuring tape.
- Fabric relaxation rack or clean relaxation table.
- Pattern weights or vacuum holding equipment.
- Sharp rotary cutter or straight knife.
- Cutting markers, tailor's chalk, or removable fabric pens.
- Notching tool and drill hole marker when appropriate.
Sewing and inspection tools
- Transparent seam gauge.
- Edge guide or seam guide attachment.
- Matching templates for pockets and collars.
- Pressing equipment with controlled temperature and steam.
- Inspection table with a contrasting background.
- Camera or tablet for recording sample alignment.
- Measurement chart showing approved tolerances.
Follow a Step-by-Step Production Process
A controlled sequence prevents small alignment errors from moving into the next operation. Each step should be documented and approved before bulk production continues.
Step 1: Inspect and relax the fabric
- Receive the fabric with roll identification, composition, width, and color information.
- Inspect the fabric for print skips, color variation, holes, stains, and visible distortion.
- Measure the fabric width at several points along the roll.
- Check whether the printed lines run straight, bow across the width, or skew toward the selvage.
- Lay the fabric flat without tension and allow it to relax for the time specified by the fabric supplier.
- Record the shrinkage result after the required washing or heat test.
Do not cut fabric immediately after unrolling it from a tightly wound roll. Relaxation allows the material to return closer to its natural dimensions and reduces panel distortion.
Step 2: Approve a printed strike-off
- Print a small fabric strike-off using the intended production method.
- Compare the strike-off with the approved artwork for scale, color, repeat, and registration.
- Place the actual front, back, collar, and pocket patterns over the strike-off.
- Confirm that the most visible motifs land in the correct positions.
- Review the sample under normal store lighting and bright inspection lighting.
- Record written approval before printing the full fabric quantity.
A strike-off should not be approved only because the colors look correct. It must also prove that the print can be positioned accurately on the garment.
Step 3: Mark the fabric grain and print direction
- Identify the selvage and the true lengthwise grain.
- Mark the print direction at the beginning of every lay.
- Mark the center of major repeats when the design requires center matching.
- Separate fabric sections with different print lots or color shades.
- Do not combine rolls unless the color and repeat have been approved together.
For stripes and checks, measure from a fixed reference such as the selvage instead of relying only on the fabric edge. A damaged or uneven selvage can create a false reference line.
Step 4: Prepare and place the cutting markers
- Use the approved garment pattern with all grain lines, notches, and alignment marks.
- Place the center front on the intended print reference line.
- Match the center back to the corresponding repeat when the design requires it.
- Position the pocket over the body panel area shown on the approved sample.
- Align the collar with the front body where the print will be visible at the neckline.
- Keep matching pieces in the same direction and avoid unauthorized flipping.
- Review the marker at full scale before cutting the complete lay.
Step 5: Control the fabric lay
- Lay the fabric on a clean, flat cutting table.
- Avoid pulling the fabric lengthwise or sideways while spreading it.
- Align the selvage consistently along the table reference line.
- Keep each layer smooth without wrinkles, bubbles, or diagonal tension.
- Check the print registration at the top, middle, and bottom of the lay.
- Reduce lay height if the fabric slips or the lower layers shift during cutting.
- Secure the lay with suitable weights or a vacuum system without compressing it excessively.
Step 6: Cut with alignment points protected
- Cut slowly around the center front and center back areas.
- Keep the cutting tool vertical to reduce angled edges through the lay.
- Do not cut through wrinkles or fabric movement.
- Use notches to identify center lines, pocket positions, shoulder points, and side seams.
- Mark the correct face and direction on every bundle.
- Separate cut components by size and color lot immediately.
For highly visible stripes, checks, or large motifs, cut a single sample layer first. Compare the resulting pieces with the approved layout before cutting the full production lay.
Step 7: Match and sew the critical components
- Match the front panels at the center front before closing the shoulder seams.
- Use the center front notch to position the camp collar accurately.
- Place the pocket using a physical template or marked placement points.
- Match stripes or motifs at the pocket edges before stitching.
- Match the shoulder and side seams where the print is most visible.
- Use a consistent seam allowance so the matching points remain stable.
- Press gently without stretching the fabric or shifting the print.
Step 8: Inspect the finished shirt
- Lay the finished shirt flat in its natural shape.
- Check the center front, collar, pocket, shoulder, side seam, and sleeve areas.
- Measure the distance from the garment edge to key print features.
- Compare the shirt with the approved sample and placement photograph.
- Record any deviation by garment size, production line, operator, and fabric roll.
- Quarantine garments outside the approved tolerance until the quality team decides whether repair or replacement is possible.
Pay Special Attention to the Collar, Pocket, and Center Front
These areas receive the most attention because they are close to the face and the front opening. Even a small mismatch can make a printed camp collar shirt look poorly made.
Align the camp collar at the neckline
Use a center front notch and a center back notch to control the collar. The collar points should be symmetrical, and the print should not shift abruptly from the body to the collar.
- Match the collar left and right halves around the center back.
- Check that both collar points have the same distance from the center front.
- Compare the print direction on the collar with the approved sample.
- Keep the seam allowance consistent around the neckline.
- Inspect the collar after pressing because heat and steam can distort soft fabric.
Match the pocket to the body panel
A pocket placed over a stripe, check, or large motif should normally continue the underlying design. The pocket may require a separate cutting layout and extra fabric consumption to achieve this result.
- Use the body panel as the reference rather than placing the pocket by eye.
- Mark the horizontal and vertical alignment lines on the pocket pattern.
- Allow for seam allowance when calculating the visible matching area.
- Confirm pocket placement after folding and pressing the pocket hem.
- Use a temporary basting stitch if the print is difficult to match.
Control the center front opening
The center front is often affected by button plackets, seam allowance, and fabric shrinkage. The print should remain visually balanced on both sides of the opening.
- Mark the true center front on the pattern, not just the edge of the placket.
- Check the print before applying buttons and buttonholes.
- Confirm that the placket width is consistent from top to bottom.
- Inspect the shirt both open and closed.
- Review the print after laundering or steam finishing.
Build a Quality Control and Tolerance System
Purchasing groups need measurable acceptance standards before approving bulk production. Without defined tolerances, suppliers and buyers may interpret the same alignment result differently.
Define acceptable alignment tolerances
The tolerance depends on the print type, garment price point, and visual importance of the area. A large motif at the center front usually requires tighter control than a small all-over print at the side seam.
- Set separate tolerances for the center front, collar, pocket, shoulder, and side seam.
- Define whether tolerance is measured at the seam line or at the visible garment surface.
- Use a physical approved sample as the primary visual reference.
- Document acceptable and unacceptable examples with photographs.
- Apply the same standard to all sizes, colorways, and production lots.
Use an in-line inspection checklist
- Is the fabric roll or lot correctly identified?
- Is the print scale consistent with the approved strike-off?
- Are center front and center back marks correctly positioned?
- Does the pocket match the surrounding body print?
- Are both collar points symmetrical?
- Are stripes, checks, or borders continuous at the main seams?
- Has pressing changed the position or shape of the print?
- Are defects being recorded by roll, size, operator, and sewing line?
Inspect at several production stages
Final inspection alone is not enough. Check alignment after printing, after cutting, after pocket attachment, after collar attachment, and after finishing. Early inspection reduces the number of defective garments that reach the packing stage.
Common Mistakes to Avoid
Most pattern alignment failures are preventable when the production team understands where avoidable movement and inaccurate assumptions occur.
Cutting fabric before it has relaxed
Fabric that is still under roll tension can shrink or shift after cutting. Allow the fabric to relax and complete the required shrinkage test before creating the production marker.
Using the fabric edge as the only reference
The edge may be bowed, stretched, or damaged. Confirm the true grain and print direction at several points across the roll before placing the pattern.
Flipping one-way pattern pieces
Flipping a piece can reverse a directional motif or create a shade difference. Clearly label all one-way pieces and approve any two-way cutting decision before production.
Placing pockets by eye
Visual placement is unreliable, especially when the print repeat is large. Use placement marks, a template, or a transparent matching guide.
Ignoring seam allowance during matching
The visible alignment must be calculated from the finished seam position, not only from the raw cut edge. Mark the seam line when precise matching is required.
Stretching the fabric during sewing or pressing
Soft fabrics can grow or skew when pulled through the machine or pressed with excessive steam. Use controlled handling, suitable presser-foot pressure, and a stable pressing method.
Approving a sample without checking every component
A sample may have a well-matched front but a misaligned pocket or collar. Inspect every major component before using the sample as the bulk production standard.
Reduce Purchasing and Production Risk
Purchasing groups are usually concerned with more than appearance. They also need predictable consumption, low rejection rates, consistent delivery, and clear supplier accountability.
Confirm alignment requirements during supplier quotation
- State whether pocket-to-body matching is required.
- State whether collar-to-body matching is required.
- Identify which stripes, checks, or motifs must continue across seams.
- Request estimated fabric consumption for one-way cutting.
- Request the expected yield loss caused by matching requirements.
- Confirm whether the supplier has in-house cutting and inspection capability.
Approve a complete pre-production sample
The pre-production sample should use the intended fabric, print method, trims, sewing construction, and finishing process. A sample made from substitute fabric cannot accurately predict final alignment.
- Approve the artwork and print scale.
- Approve the fabric quality and shrinkage result.
- Approve the placement of the front, back, pocket, collar, and sleeves.
- Approve the sewing construction and seam allowance.
- Approve the washed or finished appearance.
- Distribute the approved sample and measurement sheet to every relevant team.
Track defects by root cause
Record whether each defect came from printing, spreading, cutting, sewing, pressing, or finishing. This information helps the supplier correct the process instead of simply repairing individual shirts.
- Printing issue: repeat distortion or registration shift.
- Fabric issue: skew, bow, shrinkage, or width variation.
- Cutting issue: incorrect grain, marker placement, or layer movement.
- Sewing issue: uneven seam allowance, incorrect notch matching, or pocket displacement.
- Finishing issue: heat distortion, stretching, or incorrect pressing.
When these controls are included in the technical package, buyers can compare suppliers more accurately and reduce unexpected rework, delayed shipment, and quality claims.
Use a Final Approval Checklist Before Shipment
A final checklist ensures that the alignment standard is applied consistently across the entire order.
Final printed camp collar shirt inspection
- Confirm the shirt matches the approved artwork and sample.
- Check center front balance with the shirt open and closed.
- Check collar point symmetry and neckline alignment.
- Check pocket-to-body print continuity.
- Check shoulder and side seam matching where required.
- Check the print direction on sleeves and collar.
- Check for fabric skew, stretching, shrinkage, and pressing distortion.
- Confirm that size grading has not moved important motifs outside the approved area.
- Record inspection results by color, size, fabric lot, and production batch.
- Keep photographs of approved and rejected examples for future orders.
When to reject or rework a garment
Reject or rework the garment when the misalignment is visible in normal viewing conditions, affects the symmetry of the shirt, changes the intended position of a major motif, or falls outside the buyer's documented tolerance. Minor variation in an all-over print may be acceptable only when it does not affect the garment's overall appearance and has been approved in advance.
With accurate artwork mapping, relaxed fabric, controlled cutting, matched sewing points, and documented inspection standards, teams can prevent most pattern misalignment problems before they become expensive production defects. Meninthemirror can help brands develop a more consistent printed camp collar shirt program from sampling through bulk delivery.