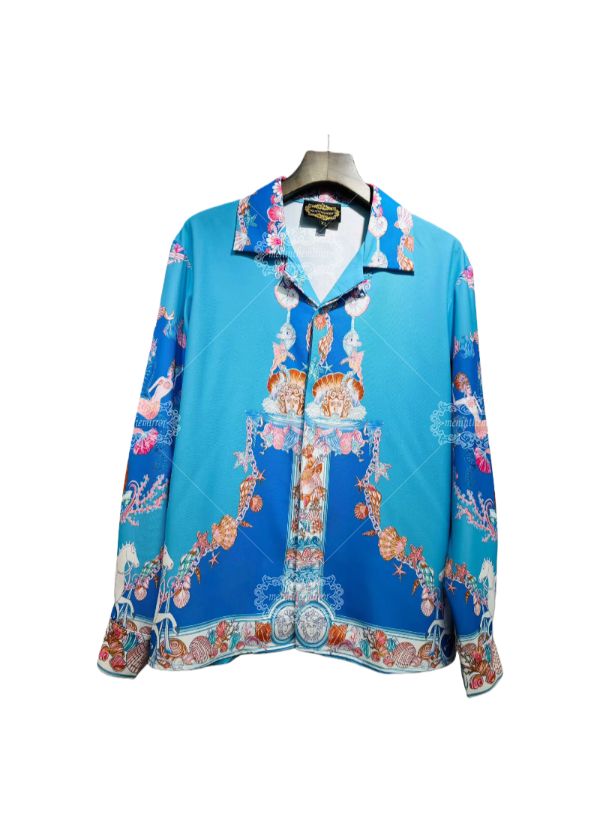






When a custom clothing supplier delivers an order, the most expensive mistakes are often hidden in plain sight: incorrect sizes, weak print adhesion, missing pieces, or cartons damaged during transit. This final inspection checklist for custom apparel shipments combines a garment quality inspection, size tolerance review, and pre-shipment inspection process. It is designed for online clothing brands, event teams, schools, restaurants, fashion designers, and buyers ordering custom shirt printing services. The same method can be used to assess Meninthemirror samples, compare suppliers, and document pictures before approving a shipment.
Who Needs a Final Inspection Checklist for Custom Apparel Shipments?
A final inspection is useful whenever apparel is produced in multiple sizes, colors, fabrics, or decoration methods. It is especially important when the shipment will be sold to customers or worn in a public campaign, because one visible defect can affect returns, reviews, and brand credibility.
- Independent fashion brands: Confirm that designer clothing matches the approved sample before inventory is released.
- Retailers: Check size ratios, labeling, folding, and packaging before products reach a warehouse.
- Event organizers: Verify names, dates, logos, and delivery quantities before an event deadline.
- Restaurants and hospitality teams: Check logo placement, color consistency, and comfort across staff uniforms.
- Schools and sports clubs: Confirm player names, numbers, size distribution, and print durability.
- E-commerce sellers: Reduce customer complaints by checking both appearance and measurable specifications.
What a Professional Custom Apparel Inspection Should Cover
A reliable inspection does not depend on the phrase “looks good.” It uses agreed specifications, sample measurements, defect categories, and photographic evidence. The inspection should cover six areas:
- Quantity and assortment
- Fabric and garment construction
- Measurements and size tolerance
- Printing, embroidery, labels, and other decoration
- Packaging and shipment condition
- Documentation and corrective action
Quantity and Assortment Check for Custom Shirt Printing Services
Count the cartons first, then count the garments inside each carton. Do not rely only on the supplier’s packing list. Record the quantity by style, color, size, and decoration.
| Inspection item | Recommended record | Common failure |
|---|---|---|
| Total units | Physical count compared with purchase order | Short shipment or unexplained overage |
| Size ratio | Separate count for XS, S, M, L, XL, and larger sizes | Wrong size packed in the correct outer carton |
| Color assortment | Count each color against the approved breakdown | Similar shades mixed together |
| Style or SKU | Match neck label, hangtag, and purchase-order code | Two designs packed under one SKU |
Fabric, Construction, and GSM Verification for Designer Clothing
Review fabric weight, composition, hand feel, and construction against the approved specification. GSM means grams per square meter and is a useful indicator of fabric weight, but it does not measure softness or durability by itself. A 180 GSM cotton jersey and a 180 GSM polyester blend can feel and perform differently.
For each style, check:
- Fabric composition against the care label and purchase order
- Measured GSM when fabric weight is commercially important
- Uneven dyeing, streaks, shade variation, and visible contamination
- Open seams, skipped stitches, loose threads, and broken needles
- Collar shape, cuff recovery, pocket alignment, and side-seam twisting
- Stitch density and seam allowance in high-stress areas
- Care labels, country-of-origin labels, size labels, and fiber-content information
Cut a small fabric swatch only when the buyer’s testing policy allows it. For a non-destructive check, weigh a known fabric area and compare the result with the supplier’s GSM specification. A 5% difference may be acceptable for some products, while a premium structured garment may require a tighter tolerance. The tolerance must be agreed before production rather than invented during the final inspection.
Size Tolerance Checklist for Custom Clothing Supplier Orders
Lay each garment flat on a clean inspection table without stretching it. Use the same measuring method used for the approved sample. Measure the points that affect fit and customer complaints:
- Chest width, measured one inch below the armhole
- Body length from the highest shoulder point to the bottom hem
- Shoulder width
- Sleeve length
- Waist, hip, or leg opening where applicable
- Neck opening and collar height
Example: if the approved chest width is 56 cm with a tolerance of ±1.5 cm, acceptable measurements range from 54.5 cm to 57.5 cm. A measurement of 58.5 cm is outside the agreed range even if the shirt looks attractive. Record at least one measurement from each size, and increase the sample if the first measurements show variation.
Step-by-Step Final Inspection Process for Custom Apparel Shipments
Step 1: Prepare the Approved Reference Set
Before opening cartons, gather the purchase order, approved sample, artwork file, tech pack, size chart, packing instructions, and shipping plan. The reference set should show:
- Exact garment style and fabric composition
- Color standard or approved physical sample
- Print dimensions and placement measurements
- Embroidery size, thread colors, and stitch direction
- Label position and wording
- Packaging method and carton markings
If the approved sample has changed during production, mark the latest approved version with a date and revision number. Using an outdated sample is a frequent cause of false rejections.
Step 2: Inspect Cartons and Shipping Packaging
Photograph each carton before opening it. The pictures should show the carton number, shipping label, visible damage, moisture marks, crushed corners, and tape condition. Weigh a selection of cartons and compare the results with the packing list when freight accuracy matters.
Look for:
- Wet cardboard or water staining
- Open seams or replaced tape
- Broken straps or crushed corners
- Missing carton numbers
- Incorrect shipping marks
- Loose garments without protective inner bags when bags are required
Step 3: Select a Representative Sample
Inspecting only the top garment is not enough. Select units from the beginning, middle, and end of the production lot. Include different cartons, sizes, colors, and decoration locations.
For larger orders, buyers may use an AQL, or Acceptable Quality Limit, sampling plan. AQL is a statistical sampling method, not a guarantee that every garment is defect-free. The inspection agreement should define the lot size, sample size, critical defects, major defects, minor defects, and acceptance or rejection numbers. If no AQL plan exists, document a practical sample rule, such as inspecting 80 units from different cartons for a medium-sized shipment.
Step 4: Review Appearance and Construction
Inspect garments under consistent lighting. Natural daylight or a neutral light source is preferable for comparing colors. Check the front, back, sleeves, inside seams, collar, hem, and decorated areas.
Classify defects by effect:
| Defect class | Example | Suggested action |
|---|---|---|
| Critical | Sharp foreign object, unsafe component, or legally incorrect fiber label | Stop shipment and obtain corrective action |
| Major | Wrong size, large print crack, open seam, missing logo, or severe shade mismatch | Reject affected units or require rework |
| Minor | Loose thread, small isolated stitch irregularity, or light removable mark | Repair, remove, or accept under the agreed limit |
Step 5: Test Printing, Embroidery, and Decoration
For screen printing, direct-to-garment printing, heat transfer, sublimation, and other custom shirt printing services, compare the decoration with the approved artwork. Measure the print width, height, distance from the collar, and distance from side seams.
Check for:
- Color mismatch or incomplete coverage
- Blurry edges, pinholes, bleeding, or registration errors
- Cracking, lifting, bubbling, or peeling
- Incorrect logo proportions
- Misspelled names, dates, numbers, or slogans
- Prints placed too high, too low, or off-center
A simple internal print-adhesion check can include folding the garment along the printed area and applying a controlled wash test to a retained sample. Do not describe a print as durable based on visual inspection alone. A proper wash test should specify water temperature, detergent, cycle, drying method, and number of cycles. Results from a five-cycle test cannot automatically be presented as proof of performance after fifty washes.
For embroidery, inspect thread tension, satin-stitch coverage, backing visibility, skipped stitches, loose thread tails, and alignment. A small amount of backing may be normal inside a garment, but it should not create discomfort or show through the front.
Step 6: Check Labels, Folding, and Retail Packaging
Packaging errors can create a customer-service problem even when the garment itself is correct. Verify the size label, care label, hangtag, barcode, SKU, polybag warning, and folding direction.
Open a sample of sealed retail packages. Confirm that the garment inside matches the external label. Check whether polybags are sealed, perforated, and sized according to the buyer’s packaging instruction. For e-commerce inventory, scan a sample of barcodes and confirm that each code leads to the correct product record.
Unboxing Experience and Actual Testing Workflow
A useful unboxing review records what a warehouse employee or final customer will experience. The test should be repeatable rather than based on one attractive presentation.
- Record the delivery date, carton count, and carton condition.
- Photograph unopened cartons from six sides when damage is suspected.
- Open cartons without cutting into garments or labels.
- Record inner packaging, folding, moisture protection, and odor.
- Remove one garment from each selected carton.
- Compare color, size, artwork, and labeling with the approved reference.
- Measure the garment at the specified points.
- Inspect seams and decoration under consistent lighting.
- Record defects with a unique identification number.
- Reseal approved units and isolate rejected units.
For pictures, use one overview image and one close-up for every defect. Include a ruler, color card, or measurement tape where scale matters. A photograph of a crooked logo without a reference line is difficult to challenge later. Store the original files with the inspection date and purchase-order number.
Real Customer Case: How a Small Apparel Brand Avoided a Full Reprint
The following case is anonymized to protect the buyer and supplier. It reflects a common production-review situation rather than a claim about a specific named customer.
A small online apparel brand ordered 600 heavyweight graphic T-shirts in three colors and five sizes. The buyer approved the artwork by screen image but did not specify a maximum print-placement deviation. During final inspection, the team measured 24 shirts from eight cartons. Seven shirts had the graphic positioned more than 2 cm lower than the approved sample, and four shirts showed visible color variation between cartons.
The buyer separated the affected cartons instead of rejecting the entire shipment. The supplier replaced 48 shirts, corrected the packing labels, and provided a retained print sample for a wash test. The inspection took approximately three hours, but it prevented the buyer from shipping mismatched products to customers. The important lesson was not that every order needs a large inspection team; it was that the buyer had measurable placement records, carton-level pictures, and a written acceptance standard.
This case also shows why a visual approval alone is incomplete. “The print is centered” should become “the print is 8 cm ± 1 cm below the collar seam and centered within ±0.5 cm from the garment’s vertical centerline.” Measurable instructions reduce disagreement.
Performance Analysis: Accuracy, Ease of Use, and Documentation
Inspection Accuracy
Accuracy improves when inspectors use the same tools and sequence. A steel ruler or calibrated measuring tape is more reliable than visual estimation. A digital scale can support GSM checks, while a color reference helps identify shade differences under consistent lighting.
Use a defect log with these fields:
- Garment style and SKU
- Carton number
- Size and color
- Defect location
- Defect classification
- Measurement or test result
- Pictures and video reference
- Recommended disposition
Ease of Use for Small Teams
A small brand can complete a basic inspection with a clean table, measuring tape, ruler, weighing scale, phone camera, labels, and spreadsheet. A two-person team can improve consistency: one person measures or examines, while the second person records the result. For repeat orders, save the checklist as a template and add only the style-specific measurements.
Documentation Quality
The best inspection report answers five questions:
- What was ordered?
- What was inspected?
- What was found?
- Which units or cartons were affected?
- What must happen before shipment approval?
For Meninthemirror or any other supplier, request a corrective-action report when defects exceed the agreed limit. The report should identify the cause, affected quantity, correction, reinspection date, and person responsible. A promise to “be more careful next time” is not a complete corrective action.
Meninthemirror Compared With Other Custom Apparel Suppliers
A fair supplier comparison should evaluate process evidence rather than marketing language. The table below is a practical framework for comparing Meninthemirror with a low-cost marketplace seller, a local print shop, and a full-service apparel manufacturer.
| Evaluation area | Meninthemirror review focus | Low-cost marketplace seller | Local print shop | Full-service manufacturer |
|---|---|---|---|---|
| Sample approval | Confirm whether a dated physical or digital approval record is provided | Often dependent on chat messages | Usually easy to review in person | Typically managed through tech packs |
| Size consistency | Request size-chart measurements and final inspection records | May vary between production batches | Can be consistent for repeat blanks | Usually controlled through specifications |
| Decoration control | Verify placement, color, and adhesion test method | Evidence may be limited | Often strong for small print runs | Usually includes production approvals |
| Minimum order quantity | Confirm style, color, and size minimums before payment | Can be low but with less customization | Often low for printing on stock garments | Usually higher for custom cut-and-sew products |
| Shipping preparation | Review carton marks, packing list, and pictures | May use standardized export packaging | May not be optimized for international freight | Usually includes formal packing procedures |
Meninthemirror should be rated on the evidence available for the specific order: approved sample, measurements, defect rate, response time, corrective action, and delivery condition. Supplier performance can differ by product, production batch, and decoration method, so one successful sample should not automatically represent every future shipment.
Recommended Final Inspection Checklist
Ratings and Practical Recommendations for Designer Clothing Orders
| Category | Rating framework | Recommendation |
|---|---|---|
| Specification control | 5/5 when measurements, artwork, and packaging are documented | Do not approve without a current reference set |
| Inspection accuracy | 5/5 when sampling, tools, and defect limits are defined | Use the same method on every production batch |
| Decoration review | 5/5 when placement and wash performance are measured | Record dimensions instead of relying on visual approval |
| Supplier communication | 5/5 when corrective actions include dates and quantities | Keep all decisions in written form |
| Shipment readiness | 5/5 when cartons, labels, and documents match the order | Photograph cartons before release |
Recommended approval rule: Release the shipment only when there are no critical defects, major defects are within the agreed acceptance limit, measurements meet the size chart, and all corrective actions are documented. If a defect affects safety, legal labeling, brand identity, or customer fit, treat it as a shipment-blocking issue regardless of the overall defect percentage.
Final Verdict on Custom Clothing Supplier Quality Control
The strongest final inspection for custom apparel shipments is specific, measurable, and supported by pictures. It checks quantity, fabric, GSM, construction, size tolerance, print adhesion, decoration placement, labels, packaging, and shipping condition. Meninthemirror can be considered alongside other suppliers when it provides the same evidence: approved references, inspection records, accurate packing lists, and documented corrective actions. The supplier with the lowest price is not necessarily the lowest-cost option if incorrect sizes, reprints, returns, or missed events follow.
For designer clothing and custom shirt printing services, use this sequence every time: approve the specification, sample cartons and sizes, measure the garments, inspect decoration, photograph defects, isolate rejected units, and sign final approval only after corrective action. A clear final inspection checklist for custom apparel shipments protects inventory, reduces avoidable returns, and gives both buyer and supplier a shared definition of acceptable quality. Keep the garment quality inspection report, size tolerance results, AQL decision, pre-shipment inspection notes, and dated pictures with the order records.